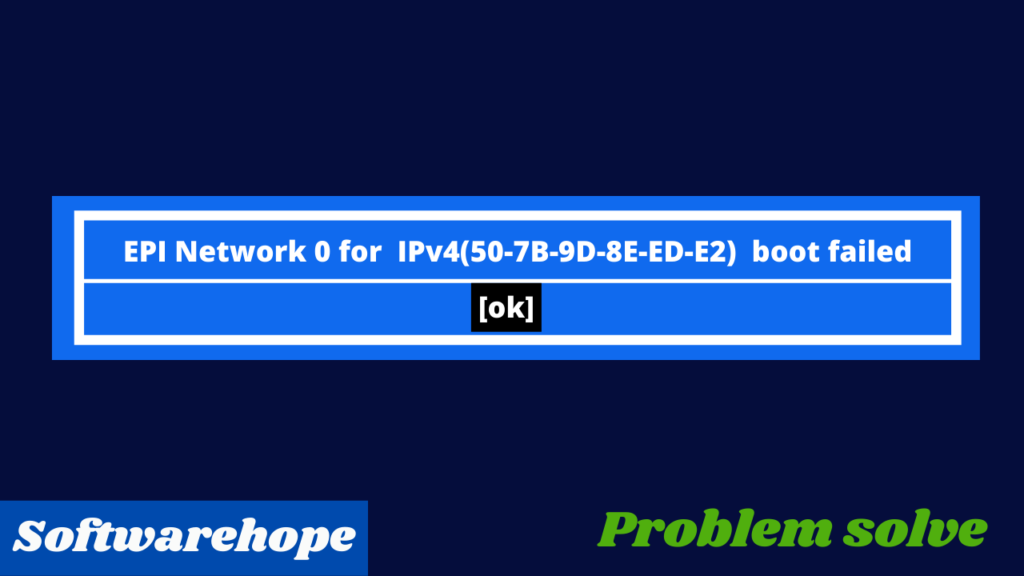
My computer was almost finished updating when it became stuck on the Lenovo “screen”. Every time I switch it on and off, remove the plug and re-insert it, the problem still exists. I’m not sure how to remedy this. Try answering.

Table of Contents
Why is Lenovo stuck in the boot loop?
Stuck in a boot loop indicates that the Windows startup screen must automatically update while the boot process is still ongoing, which results in a blank screen and no progress to the next startup phase. The Windows PC fails to start up in the boot loop as a result of unexpected delays in the booting process. Because the machine cannot finish the normal boot sequence, the startup will fail.
What Causes this Error?
- Too many startup apps: When Windows starts up for the first time, too many startup programs can be loaded.
- Faulty Windows Updates: Installing faulty Windows Updates can cause your machine to run slowly.
- Unfavorable drivers: Reverse drivers are often used.
- Driver signatures that have not been verified: Some of your current drivers may not have the proper digital signature.
- Corrupt Master Boot Record Entries: The PC firmware is unable to access the MBR due to corrupt registry or system files.
- Unwanted software can sometimes cause a bottleneck when starting Windows. This also applies to unwanted Windows services.
- Software issues: There may also be a problem with the Windows operating system that prevents the machine from proceeding from the boot menu. Windows operating system files can sometimes be damaged by viruses or other malicious programs, causing the computer to get stuck on the boot menu.
- Slow lock screen/screensaver response: The login screen cannot load due to the lockscreen or screensaver.
- Hard Drive Failure: The system will display problems like a “Windows boot error” when an HDD is damaged. When the Lenovo logo appears, the Lenovo PCs are likewise frozen at the starting screen.
Best Ways to Fix a Lenovo laptop stuck on the boot Loop
Part 1: Automatic Repair
Part 2: Repair your boot sector or boot sector repair
Part 3: Run Lenovo Diagnostics tools
Part 4: Unplug all external devices and perform a hard reset
Part 5: Reset the BIOS to a default setting
Part 6: Steps about how to factory reset Lenovo laptop or reinstall
Part 1: Automatic Repair
You can fix your operating system problems by using the instructions below, or you can select Automatic Repair.
Start Windows 7/8/10 iso file in Step 1 and press any key to proceed.
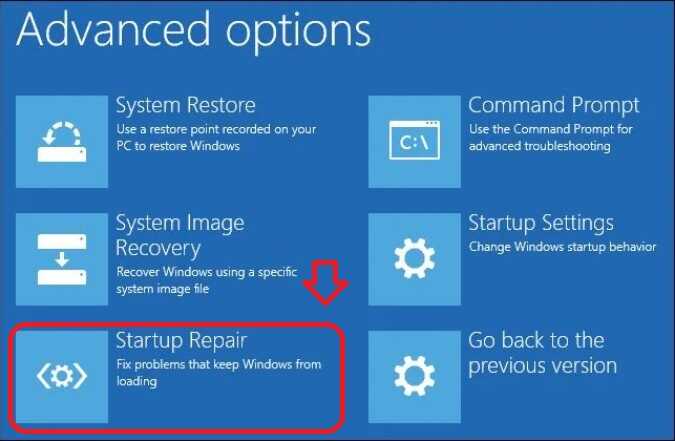
Step 2. Then navigate to Repair your computer -> Troubleshoot-> Advanced options -> Automatic Repair.
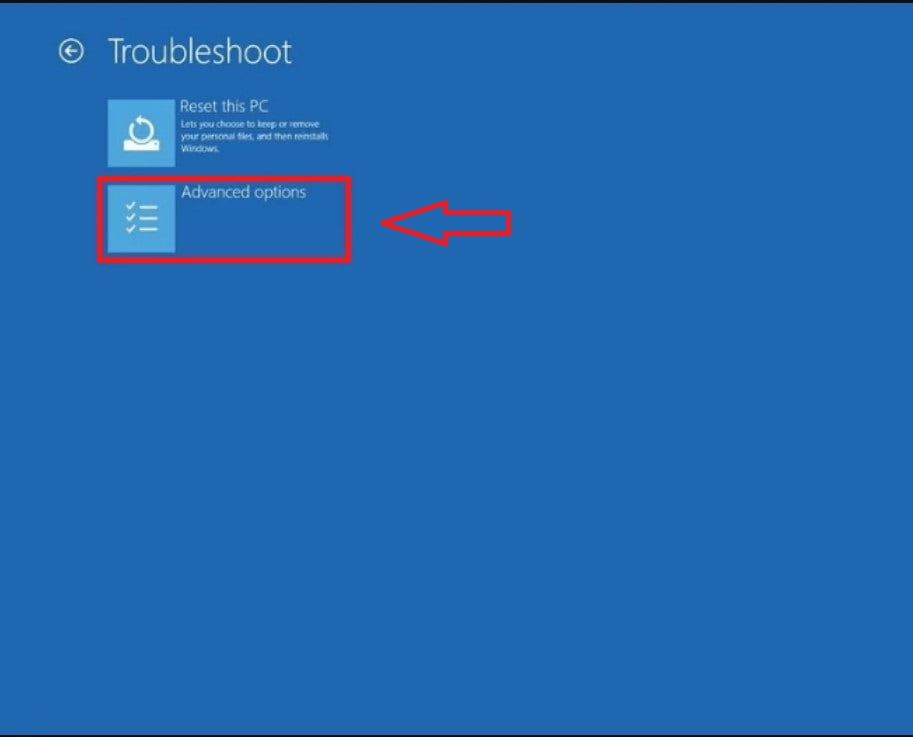
Step 3: As soon as the automatic repair completes, fix Lenovo stuck in boot loop by following the on-screen directions.
Part 2:Repair your boot sector or boot sector repair
If the boot sector or BCD file is damaged or missing, the Lenovo laptop will become stuck in the boot loop. Command prompt and third-party software are the two possible solutions.
Command Prompt – Bootrec.exe tool
Users having a windows-installation CD can do this:
Step 1: Command Prompt – Bootrec.exe tool
If you have a Windows installation disc, you could do this:
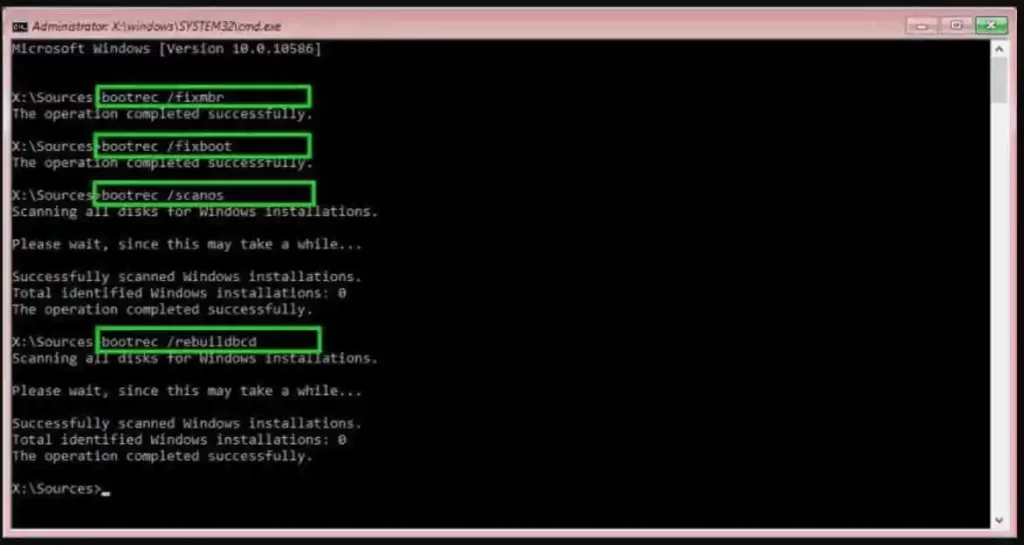
Step 2: Then go Repair your computer -> Troubleshoot ->Advanced options -> Command Prompt.
Step 3: Input the following commands and execute them one by one:
• bootrec /fixmbr
• bootrec /fixboot
• bootrec /scanos
• bootrec /rebuildbcd
Part 3:Reinstall Windows
To reinstall Windows, adhere to the steps listed below.
Step 1, restart the computer before entering the BIOS by pressing the F9, F2, or Del/Esc keys. Select DVD or USB boot for the computer.
Step 2: Restart your computer after inserting a DVD or USB flash drive. Allow the Setup to start on your computer.
Step 3: Select your time zone, currency, and language.
Step 4: To reinstall Windows, click the install now option and then follow the prompts.
Part 4:To solve the issue, use the Lenovo Diagnostics tools.
In its PCs, Lenovo Solutions Center refers to the diagnostic tools it offers. Users of Lenovo can test and troubleshoot their machine using these tools. Additionally, it helps in resolving the problems with Windows 7, 8, 8.1, and 10 functioning.
In order to improve speed and performance, the Lenovo diagnostic tools scan our system’s hardware, updated software, and learn the system information. During booting, you can press the keys F1, F2, F9, F10, F11, and F12. You can access the boot menu by pressing one of these keys.
Users can check their system’s hard drive using the Lenovo Diagnostics software. The customer might have to get a new hard drive if the existing one has problems.
Part 5: Restart in Safe Mode
You can also start your laptop in safe mode. Windows has a mode called “safe mode” that can be used to identify and fix system issues. To start your Lenovo computer in safe mode, follow these instructions.
Step 1: Turn on your computer, and as soon as the Lenovo logo displays on the screen, click F8 or Shift + F8.
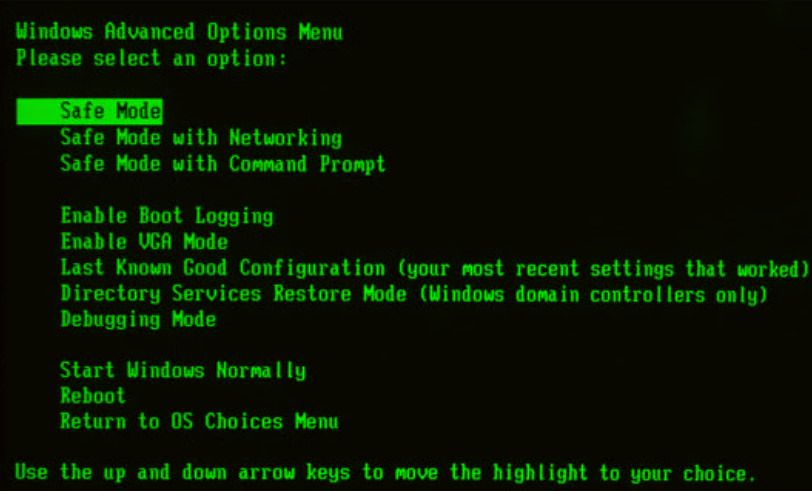
Step 2: Click “Safe Mode” and enter the command.
Part 6:Reset the laptop's BIOS to default settings
Your system is more likely to get stuck in the boot loop if the first boot device is something other than the system hard drive. You should restart your computer and press F2 or any other key to enter the BIOS in order to restore the BIOS. After that, you should follow to the loading default settings instructions. Press the ESC key to exit the BIOS after saving your modifications.
🌟 Unleash the Digital Power with Devendra Gupta 🌟
🖥️ Tech Enthusiast |Software Reviewer| Blogging Expert | SEO Guru |
Web developer 📊
🔍I tested hundreds of Software and reviewed

